Want to hide the taskbar on Windows 11?
Customizability is what most users love about Windows. This allows you to layout everything you need the way you want it, which will certainly boost your productivity.
If you have been customizing your operating system for a long time, you may have realized by now that Windows 11 has a smaller screen real estate due to the redesigned taskbar.
Fortunately, you can take some back by hiding the taskbar. This should allow applications to run in full screen and give you space below the screen for third-party widgets.
Learn multiple methods on how to hide the taskbar on Windows 11 through this guide.
1. Windows Auto Hide Feature.
The auto-hide option for the taskbar is still available on Windows 11. You can access the option from the Settings or tweak it using Command Prompt.
To enable auto-hide from the Settings app, follow the steps below:
- Right-click anywhere on your Taskbar.
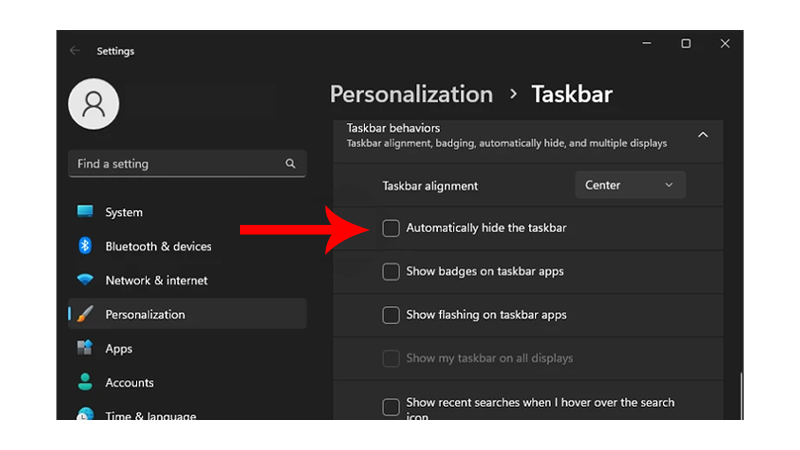
- Click on Taskbar Settings.
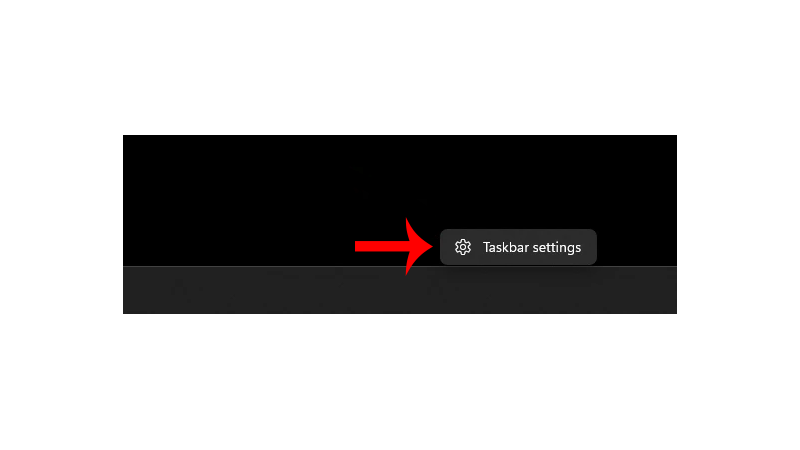
- Now, find Taskbar Behaviors and expand it.
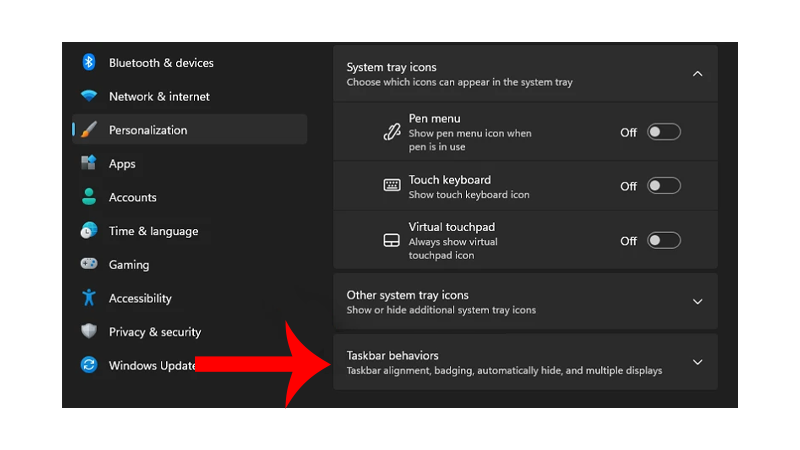
- Look for Automatically Hide the Taskbar and mark it checked.
You can also enable the feature using Command Prompt by doing the following:
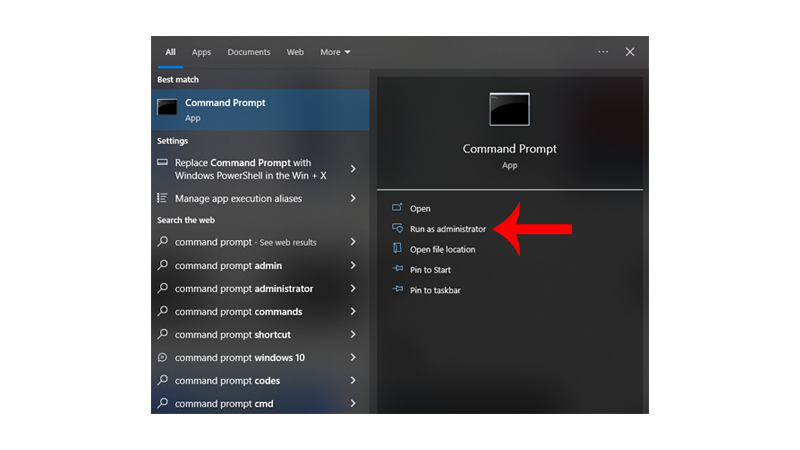
- Press the Windows key on your keyboard to open the Start Menu.
- Look for Command Prompt and click Run as Administrator.
- Now, copy the code below, paste it in the command line, and hit Enter.
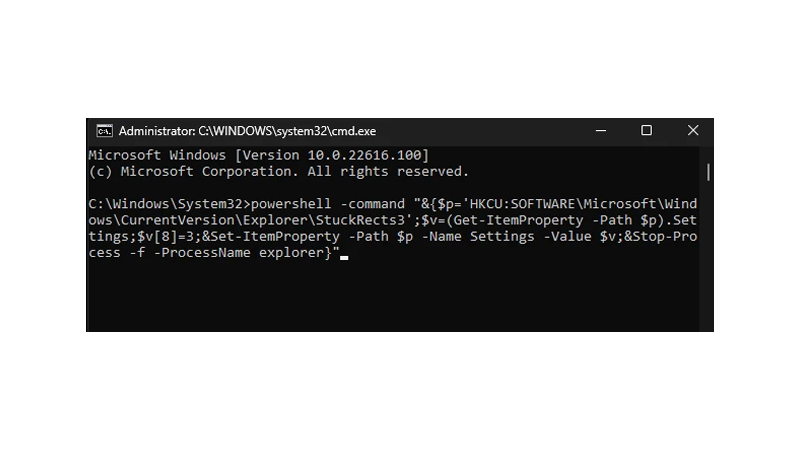
powershell -command "&{$p='HKCU:SOFTWARE\Microsoft\Windows\CurrentVersion\Explorer\StuckRects3';$v=(Get-ItemProperty -Path $p).Settings;$v[8]=3;&Set-ItemProperty -Path $p -Name Settings -Value $v;&Stop-Process -f -ProcessName explorer}"Regardless of what option you choose, the auto-hide taskbar feature should now be enabled on your computer.
To access the Taskbar, hover your cursor at the bottom portion of your screen.
2. SmartTaskbar.
SmartTaskbar is an open-source tool that can automatically hide the taskbar when you open full-screen applications.
Although the auto-hide option works fine, it can be annoying to repeatedly invoke the Taskbar when your cursor gets too close from the bottom of the screen.
Here’s how you can use the SmartTaskbar:
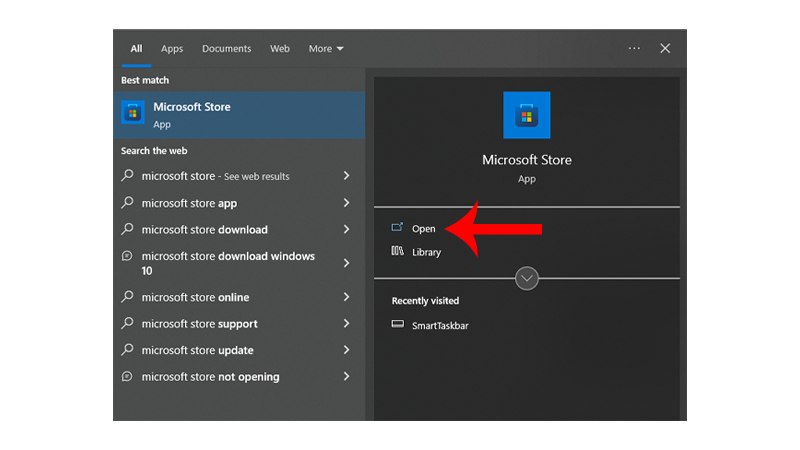
- Click on the Windows icon on the Taskbar to open Start Menu.
- Find Microsoft Store and click Open.
- Now, search for SmartTaskbar.
- Click the Get button to download the app.
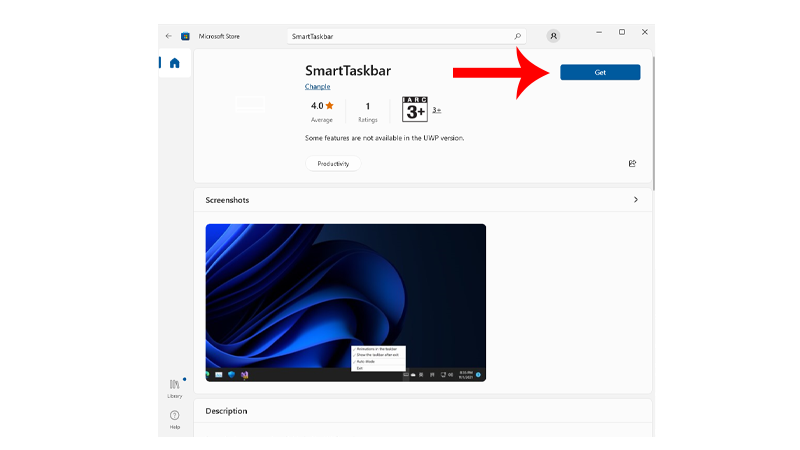
- After installing SmartTaskbar, you’ll find its icon in the lower right corner of the Taskbar.
- Right-click on it and configure its settings based on your preference.
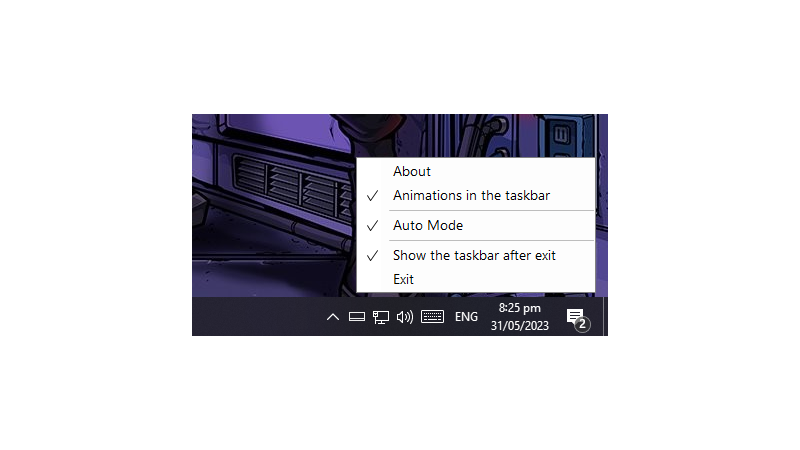
- Animations in the Taskbar – This option allows you to control the animation used when showing and hiding your taskbar.
- Auto-Mode – This option is enabled by default. It automatically hides your taskbar when you have a full-screen app on the screen. You can disable it if you wish to manually enable SmartTaskbar.
- Show the Taskbar After Exit – This option allows you to control whether the taskbar stays hidden after closing a full-screen app.
Note
Double-clicking on the SmartTaskbar icon in your taskbar will toggle Auto-Mode On/Off.
3. Hide Taskbar Permanently.
If you want to hide your taskbar permanently, you’ll have a few third-party tools at your disposal.
Auto Hotkey
This is a keyboard mapper and macro creator that can use custom scripts. You can use this tool to hide the taskbar on Windows 11.
Here’s what you need to do:
- First, download AutoHotkey on your computer.
- Go to your Downloads folder and run the installer. Follow the prompts to install AutoHotkey.
- Now, download the script file below:
- Extract the file and run it on our computer.
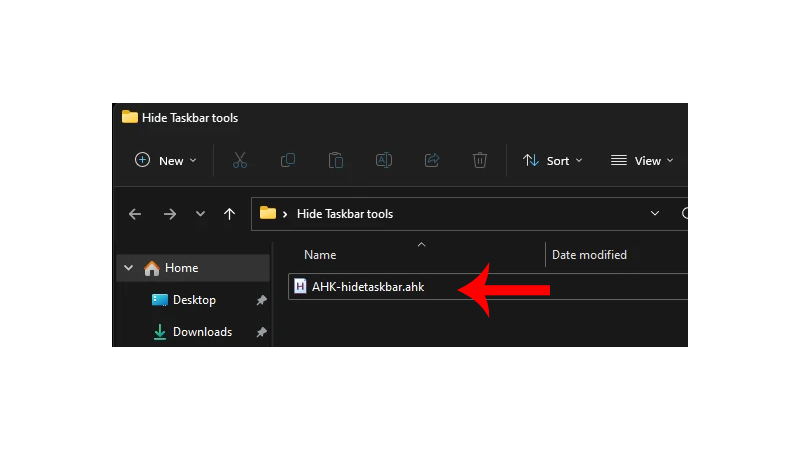
- This will launch AutoHotkey.
Now, you can press F12 to hide and unhide the taskbar on your computer.
Taskbar Hide for Windows
Taskbar Hide is a proven third-party application that can hide your taskbar permanently. It also surprisingly works well on Windows 11.
Here’s how you can use it:
- First, download Taskbar Hide on your computer.
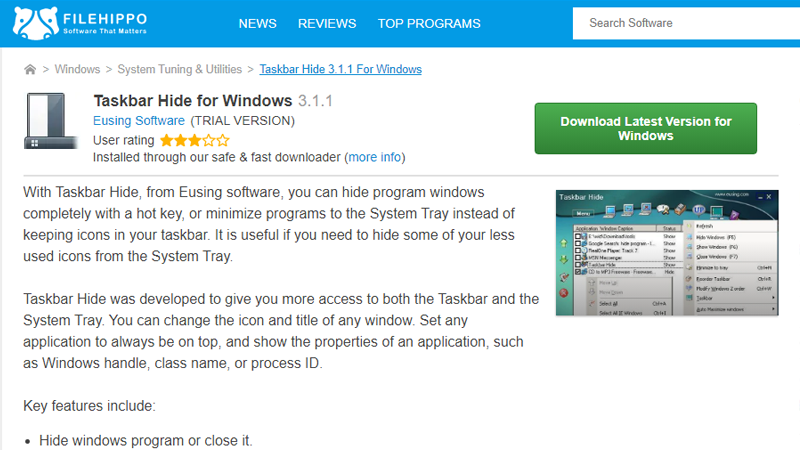
- Run the installer and follow the prompts to continue.
- After installing the tool, run it on your computer.
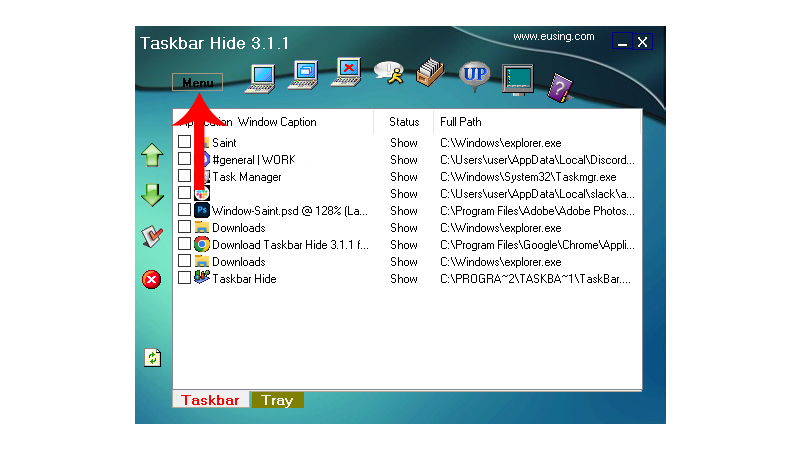
- By default, CTRL + T is used to hide the taskbar. You can also customize the hotkey based on your preference.
- Click on Menu in the upper left corner of the window.
- Open the Hotkey tab.
- Look for the Hide Taskbar option and click the text box beside it.
- Nominate a new key combination to hide or unhide the taskbar.
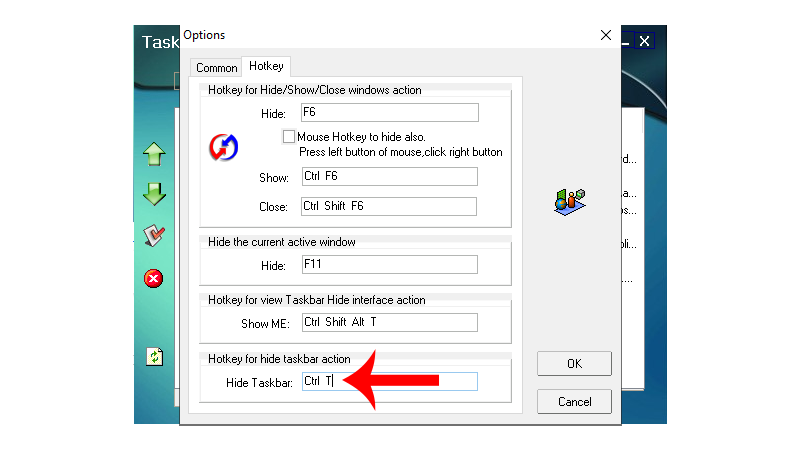
- Click OK afterward to apply the changes.
Now, you can use your new hotkey to hide or show the taskbar on Windows 11.
Using Registry Editor
If you are not comfortable installing third-party applications on your computer, you can use the Registry Editor to disable or hide the taskbar on Windows 11.
However, you won’t have the option to instantly unhide the taskbar if you go for this option.
Here’s how you can hide the taskbar using Registry Editor:
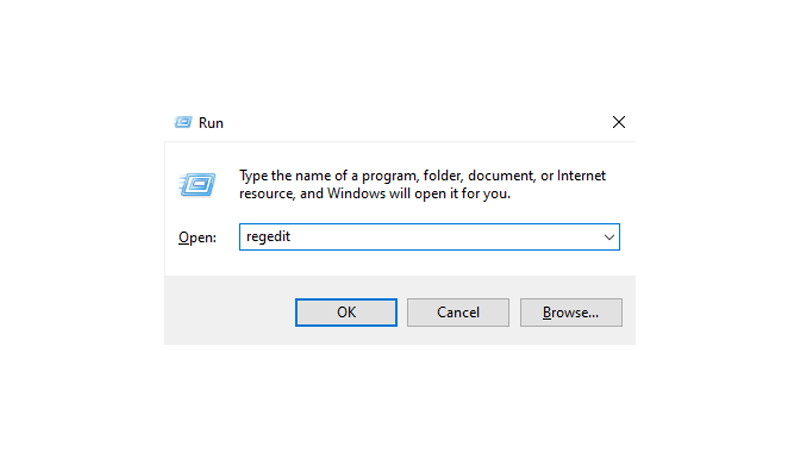
- Press Windows + R on your keyboard to open Run Command.
- Now, type regedit and click OK to open the Registry Editor.
- Enter this path on the address bar in Registry Editor:
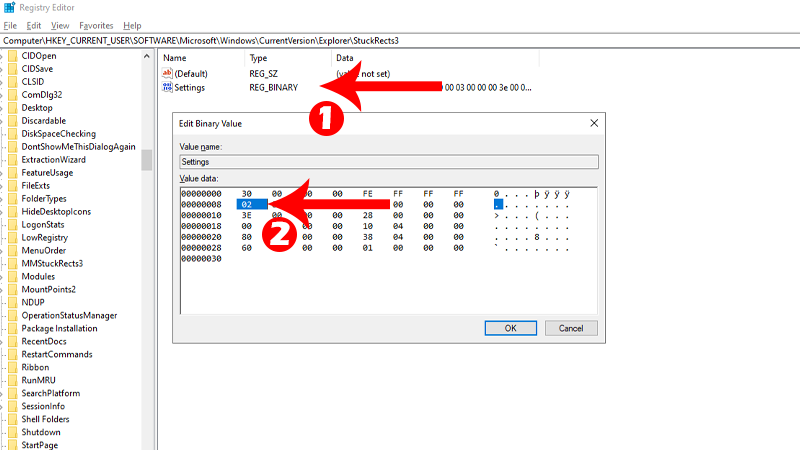
Computer\HKEY_CURRENT_USER\Software\Microsoft\Windows\CurrentVersion\Explorer\StuckRects3- Double-click on the Settings entry in the right pane.
- In the pop-up window, double-click on the first entry beside “00000008”. This value is usually 7A.
- Change the value to 7B and click OK. Close the Registry Editor. If you see 02, change it to 03.
- Press CTRL + SHIFT + ESC on your keyboard to open the Task Manager.
- Find Windows Explorer and right-click on it.
- Lastly, click Restart.
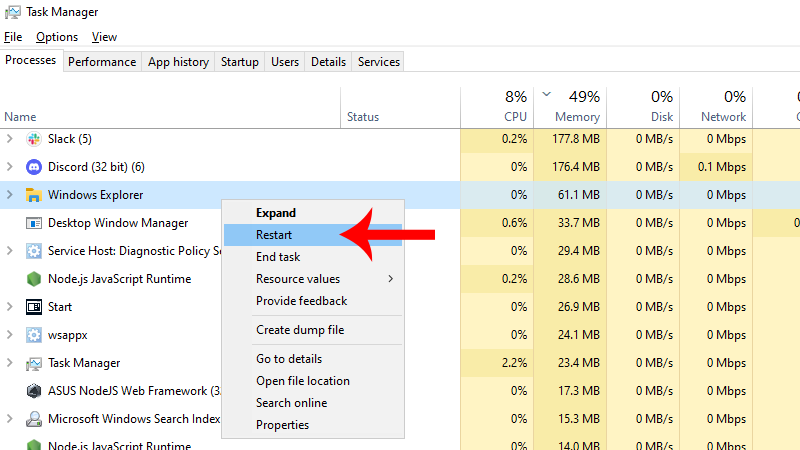
After restarting Windows Explorer, the taskbar should not appear on your screen. To unhide it, you’ll have to change the value of the entry to 7A again.
Note
- Make sure not to delete or edit other entries in the Registry Editor as this can corrupt your system.
- If you have no experience navigating the Registry Editor, we highly suggest that you stick with the other methods above.
That’s everything you need to know on how to hide the taskbar on Windows 11. If you have questions, please let us know in the comment section, and we’ll do our best to answer them.


